Create
Create a new property list by navigating to onOffice > Properties and clicking “New” at the top. Enter a title, for example: “All Properties”.
Save the property list and copy the shortcode that is under the title.
Paste the shortcode on a WordPress page where you want to display the list. You can also create a new page for this purpose.
Publish properties
In onOffice enterprise, open a property that you want to publish and go to the “Marketing” tab. In the “Own website” box, set the “Publish” setting to “yes”. The property should be saved automatically.
You may not see the property immediately on your website because the plugin caches pages for up to an hour for better performance. So if you see an empty listing, you should clear the cache.
Customize
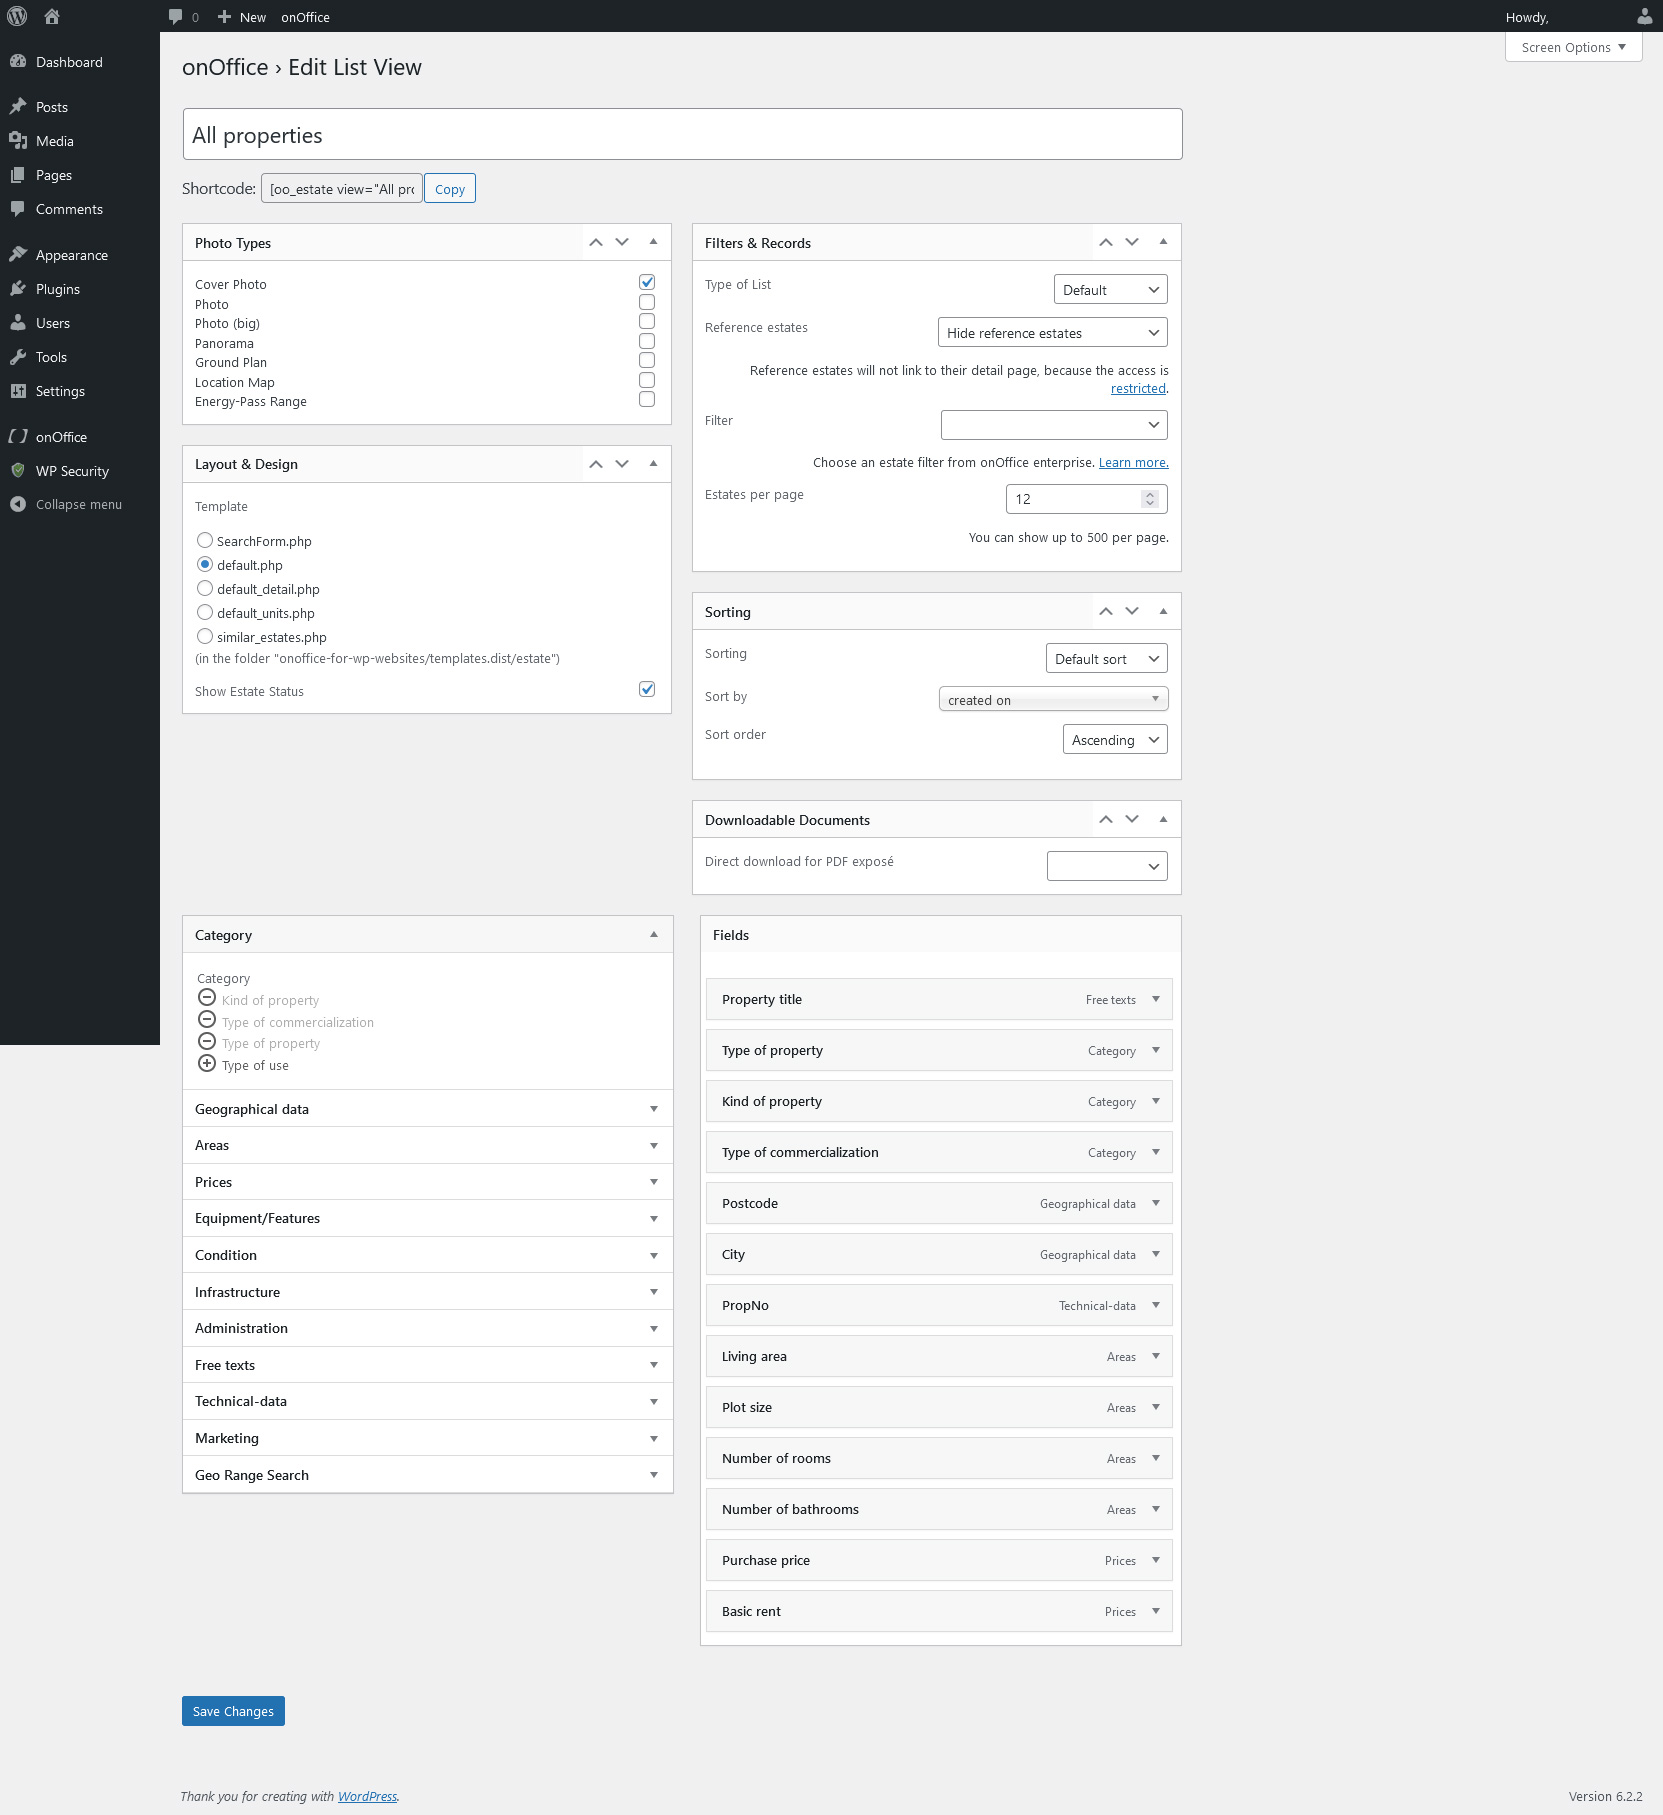
Edit the list again by navigating to onOffice > Properties and clicking “Edit” under the list name.
At the bottom you can set what information should be shown. From the left box you can select fields from onOffice enterprise and add them to the list on the right. You can also adjust the order of the fields on the right.
For example, open the Geographical Information category on the left and click the plus next to the Country field. This field has now been added to the bottom of the field list on the right. After you save and reload the WordPress page that uses the shortcode, you should see that each property also displays its country.
In the “Filters and Records” box, you can use filters from onOffice enterprise to show only certain properties in the list. For example, you can create a list only for purchase properties and another only for rental properties. In the selection field “Restrict selection” you can select any public filter from onOffice enterprise.
Later on, you will learn how to provide visitors with a property search.
How do I improve the pagespeed of property listings / detail pages?
- Dequeue of unused scripts and CSS etc. in WordPress
- We recommend Cloudimage for images
Related links
Why can’t I access the detail page of a reference property?
The detail page for reference properties is turned off by default, this can be set in the settings in the tab “Detail view” in the box “Access control”.
Why don’t my reference properties appear?
Reference lists are not displayed ain the created property list. Here a selection can be made between: Hide reference properties, Show reference properties (together with others), or Show reference properties only (all others hidden).
Why doesn’t the map with my properties (Google/OpenStreet) appear on the website?
The map is automatically displayed as long as there is a property for which the following things are entered/active:
- API Key for Google Maps stored in the settings in the WordPress backend.
- In onOffice enterprise, in the “Marketing” tab, in the “Own website” box, check the “Show on map” setting.
- Address sharing for “Portals / Website / API” in onOffice enterprise. (If release of the exact address is not desired, the fictitious addresses can be used).
Related links
Why are no properties found?
- No properties have been published for the website. In the “Marketing” tab, in the “Own website” box, set the “Publish” setting to “yes” and also set it to “Active” status?
- The API rights of the user are not set correctly.
- Empty onOffice plugin cache, other caching plugins and the browser cache.
Related links
How do I create a favorites list/watch list?
Create a new property list, select the list type = Favorites list in “Filters & Records” and then embed the shortcode on a page. In the settings of the plugin, check the box Enable favorite list / watchlist so that the tiles get the “Favorites” button
How do I add multiple images / sliders in the property list view?
- Check all photo types in the list to output all images (by default they are displayed one below the other)
A slider is theoretically possible with a template customization. However, we do not recommend this, as it greatly affects pagespeed, especially for many properties.
How can I change the number of properties per page?
In the plugin, the number of properties per page can be set in the respective property list at “Filter & Records”. We recommend 9 or 12 for an orderly and appealing display. A maximum of up to 500 properties can be displayed per page. More than 500 cause an error.
How can I change the number of columns in the property list view?
How do I create a property list for only purchase or only rental properties?
- Create property filter in onOffice enterprise (must be set to Public filter).
- In the plugin, select the filter you created in the “Restrict selection” box in the “Filters and data sets” box of the property list you created.
Related links
How do I create filters for property listings?
- Create real estate filters in onOffice and save them as “public” so that the plugin can detect them.
- Clear plugin cache so that they are visible immediately.
More about creating filters in onOffice in the enterprise help entries. If you need help creating filters, feel free to contact technical support.